Welcome DJI Spark Pilot!
Jump in and join our free Spark community today!
Sign up

Spark RC controller - removable sticks mod possible?

peejay

Active Member
Join
Jul 16, 2017
Messages
35
Loc
PL
having too much time to think about stuff to do, while being on partial lockdown, I started to figure out if it's possible to have a nice detachable sticks in Spark's RC controller - same as they were introduced in Mavic Air's RC and all the next DJI's UAVs. I didn't do it yet, it's just a plan/loud thinking for now, but I'll be happy to hear/read your opinions about plausibility of that mod.

DISCLAIMER: I'm not encouraging to do that, as it can break your RC for good - it's just a concept which might or might not work at all.

I did some research on google, hell, I even went to second, and third page on google's search results [that kind of sick person I am!], I took a look on reddit, dji's forum etc. and was really surprised, that nobody tried or even talked about it. I've found some hardcore RC mods like exchangeing the antennas or even adding a mount for antennas so you can screw/unscrew a bigger ones as you need, but nothing about sticks. either there's really nothing about it, or I just suck at searching stuff ;)

this is when my idea took over, so here goes nothing.

while doing a research on the subject, I've found out that some Mavic RC's were in kinda prototype state when sent to the customers, and some of them had removable sticks even before Mavic Air's detachable ones. as you can see in this post, they were just pull-out ones. I tried to pull the sticks from my Spark's RC with moderate force, but I think it cannot be done. I've attached some high-zoomed pictures of sticks' base [fig. 0] - it looks like there is a kinda "cut-out" line, that can imply the part can be detached, but I don't want to destroy the RC just like that, because of pulling too hard ;) maybe it's just glued too strong, I don't know.

WHAT IF we would cut the sticks as close to the base as it's possible. - see fig. 1, the red line. using a Dremel or even a small, precise hand-saw it shoud be possible.
then, we have few steps, that require more or less DIY, a thread tap/die combo - fig. 3 - is needed in that one [alternative below the points].
  1. [OPTIONAL] buy a spare sticks-set, those with thread on the outside, something like these. if you don't want to buy them - goto step 3
  2. measure the thread size, goto step 4
  3. take a thread die that matches the size of stick/stick base and prepare the thread on stick [fig. 2, part A]
  4. match thread tap to thread that is on the stick [either bought at step 1, or DIY at step 3]
  5. drill a little hole [not too deep!] in the base [fig. 2, part B] and prepare the thread with thread tap
  6. test if the stick's thread matches to the base
  7. PROFIT! now you have a detachable sticks, don't loose them!
ALTERNATIVE option is to glue a small screw to the stick [part A] and small, matching nut to the base [part B], but you'll need a very strong glue, that won't let down during even most complicated manouvers. but as "a bonus" - the screw+nut option is probably a little bit more safe, as you won't drill anything, so you don't risk destroying the sticks' mechanism in the base. on the other hand - gluing MUST BE PRECISE, so you won't glue the moving parts to themselves on the base!

ok, so that was the theory. I'll be happy to hear your insight about those ideas - but the best feedback would be from people who did some RC repairs, or even had destroyed their controllers by accident or have spare parts etc. so they would know how exactly does this part look from the inside - is the drilling too risky, or is the cutting too hard etc. I'm trying to find some broken controllers to experiment for a cheap price [and I mean dirt cheap, not 50-80% of a new one - but unfortunately all I've found was too pricey for me now (cost & shipping), just to buy and "play doctor" with the part - I'm selfemployed, and during pandemic most of my clients just stopped ordering my services, therefore I'm trying to avoid unnecessary shopping sprees to keep my budget in line ;)].

photos:

fig. 0 spark-rc-mod_0.jpg
fig. 1+2 spark-rc-mod_1-2.jpg
fig. 3 spark-rc-mod_3.jpg
 
Last edited:
I love it when people think inside, outside, above, below, and the sides if the proverbial box.

Just an observation, if you use metal stuff for your project, make sure to use non ferrous metal ( non magnetic) like aluminum, brass or stainless.

Maybe a 3D printer?

I viewed a tear down video of a Mavic remote years ago and found that the joysticks sit in a collar of sorts that allow the signals to pass through. I think it may have had a small magnetic field or something along those lines??

I have also read that some pilots were using an Apple tablet (I think) that had a magnet embedded inside for an optional cover and depending on the position of the tablet, it affected the remote and received errors in the app. When the HOME button was on the right hand side, all was good.

Good luck with your project. :)
 
hm, that's a GREAT NOTE about the non magnetic metal. didn't thought about that. so probably "regular" screw+net scenario isn't going to be the possible choice as those parts are more likely to be interferring with magnets or magnetic fields.

3D printer - sure that could be the solution, and even if right now I don't have access to any, I think that it's a way worth thinking about.
I mean - precision wise I'm afraid that printing such a small thread probably won't work too good, but I guess that nothing stops us from printing a piece of "rod", and then threading it with a chosen die.. but, but.. [sorry, just transcribing here my internal brainstorming] then much more logical would be to buy an aluminium rod with different diameters and made a screw/nut pair out of it. gluing could be easier with plastic parts probably, but aluminium would last for long I guess. one way or another - this is a solution to try just before drilling in the RC, and right after cutting the sticks off :)

also - thanks for reminding me about possible teardowns. I'll dig some more with that keywords, maybe something will clear up with those.
 
Here's the video I watched.


The guy just went into it blind to install an LED lamp to replace the annoying sound of the beeping speaker.

At the 12 minute mark is when he shows the interference with a metal object and the sticks.
 
  • Like
Reactions: peejay
Well you got me going down a rabbit hole trying to find a different angle. I thought maybe it would be possible to swap out the Spark joystick unit with a Mavic Air set? ?

I was searching for Mavic Air remote parts and got close with this.


I don't think the Mavic sticks are unscrewable, but at $8 a pop, you could purchase a couple and try your cutting and threading idea on these before hacking the remote.
 
thanks for the link to tear-down video! I envy those brave guys that just almost chaotically start to unscrew some devices and seem like they don't care if they will know how to re-assemble it :D I guess that recording whole process can help but still.. ?

btw the Mavic remote parts - I thought about it - the question is, are the Mavic's joysticks the same as Spark's? I'll probably dig more on schematics/videos later in the evening, as I'm not ready yet to unscrew my controller to check this out ;) if they are - I'll have to look if they are also available at my location [Poland preferably], so the shipping won't be ridiculosly hight [in reation with item itself]. well, AFAIR some chinese sticks for Mavic Air and DJI's smart controller [those unscrewable] are from about 2-3$ on aliexpress, and I thought about them too, but first I'll have to figure out how to mount them [after cutting off the originals]. I think that price is so low, that I'll just order them "for science". they will deliver in next few weeks, so I'll have time torethink all solutions I guess.

in the meantime I found the Spark dummy-controller on ebay [according to specifications - it's a complete one, but without mainboard and battery - but I'm not so sure if it is indeed], and seller probably won't send it to PL [at least he/she didn't mention that on countries list].
 
  • Like
Reactions: Spark 317
all right, small update.
I am after some serious shopping research, and I found almost impossible to buy a broken controller or just replacement parts.. @Spark 317 ifixit that you've linked, had the best price for both sticks but unfortunately they are out of stock [and although they have an european shop with nice priced shipping - drone parts are not a part in that shop at all. pun intended]. sticks that I've found on ebay are... $20 EACH, with additional $38 for shipping & import charges, so I'm going to pass on that too as it's too close to used, working controller ;)
I've also scratched out from my shopping list the dummy controller that I've found earlier - I'm guessing that it won't be a great idea spending over 20GBP on a shell that probably won't give me fully functional sticks to work with.

I've searched on ebay, amazon, few my local portals and finally - found the holy grail in the last place looked in - aliexpress. price is not terrible, about $28 for two sticks that look just like on ifixit, described as for DJI Mavic. next thing was to research the teardowns - found few of them but unfortunately none was showing the sticks parts, so I'm not 100% sure they will be the same.. one of the teardowns was here on the forum, I wrote to it's author - @Ender, maybe I'll get some answers and then I'll order the parts [or not]. in the meantime I've ordered two sticks with threads, maybe I'll use them. it would be a cool addition to my lava red bird :)

we'll see what is going to be next. I'll update this topic if anything would change/stop/move forward. if anybody happen to know if Mavic's sticks are the same parts as Spark's - let me know please, as this is the only info I'm looking for now.
 
  • Like
Reactions: Spark 317
...aaand another small update.
just won an auction for damaged RC [usb data pins broken, RC is charging & working via wifi, but OTG fails] - it was cheaper than the spare joysticks, so win-win for me ;)
looks like all parts are on their way to me - a donor RC from ebay and screwable sticks from aliexpress. I hope they'll get here soon and I'll be able to work with my idea :)
 
  • Like
Reactions: Spark 317
...ok, so let's continue my journey to upgrade the Spark's RC!
surprisingly, in these COVID-19 days, stuff ordered on AliExpress came a little bit quicker than usual. also - my ebay-bought RC came in the same day as joysticks [in the meantime I ordered a second model also, for comparison - it came blazingly fast]. so right now it's time to put on some engineer hat on and start cutting, drilling & having fun with upgrade.

as you can see on the photo - first pair of the joysticks has inner-thread, the second one has outer-thread. I really hoped, that inner-version would work, even if that meant old joystics would have to be cut not at the base, and there would be some sticking-out part left - it looked like it's "safer" way, as I don't know yet about thickness of the joystick mechanism in which I need to drill to use the outer-threaded sticks. unfortunately sticks are thinner. I am thinking right now how to bypass that. I'm going to try add some thickness to sticks, but as for now I'm not sure how to make it sturdy enough [thread is relatively short, so the mount must be "on point", there's no place for loose parts].

oh, and as a bonus I think I'll exchange the broken USB port [I don't have the "squared-dji-style" one, but a regular micro-usb, but I think it's even better] and this way RC would be fully-functional with OTG working again.

hopefully my next post will be a video that I'm planning to create during the whole process, so if anybody read this topic before, or even stumbled upon this few moments ago - keep your fingers crossed that I won't destroy the RC too much :D

rc-joysticks.jpg
 
Last edited:
quietly waiting for an update, been wanting to do this myself but couldn't find any reference online. couldn't find a cheap enough controller for sacrifice too. so here's hoping you succeed and just follow along.
 
quietly waiting for an update, been wanting to do this myself but couldn't find any reference online. couldn't find a cheap enough controller for sacrifice too. so here's hoping you succeed and just follow along.

spoiler alert: i did it!
I have some video recorded, I'm going to prepare short movie with info - but our landlord surprised us and I'm moving my company's office to another address and right now I'm stuck with work :( but fear no more - coming soon! :)
 
  • Like
Reactions: Spark 317
spoiler alert: i did it!
I have some video recorded, I'm going to prepare short movie with info - but our landlord surprised us and I'm moving my company's office to another address and right now I'm stuck with work :( but fear no more - coming soon! :)
double awesome.... can't wait to hear more news.
good luck with the moving and stay safe, stay healthy.
 
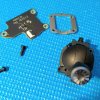
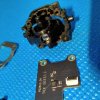
IMG_20200818_214253.jpgIMG_20200818_214309.jpg

got this far but couldn't figured out what to do next.
and this thread seems to be losing any interest. well spark is an old bird not many have them anymore. guess I'll just figure it out some other times.
 
View attachment 13291View attachment 13292

got this far but couldn't figured out what to do next.
and this thread seems to be losing any interest. well spark is an old bird not many have them anymore. guess I'll just figure it out some other times.

heh, my move to the new office and "restarting" the company from COVID-lockdown took longer than I expected, just got the fiber connected few days ago so I'm almost up-and-running completely.. I will share the video soon, even if interest falls down - just to fulfill my promise. I already feel bad for delaying that, so now it's a matter of honor for me.

anyway, there was no need to unscrew those metal frames - at least I didn't do that.

long story short - look closer at the joysticks. I planned to cut them off & make some drilling, as my original ones looked like "one piece with the mechanism". the other RC I got seemed to be a little bit different and.. after applying fair but gentle force [I used pliers to grab those metal frames in one hand, and with other hand I grabbed the joystick] and little bit of wrestling - joystick popped out, luckily without damaging anything. then I had two options - adding a cut-off thread from the screw, or filling up the hole, drilling a bit and threading it with the replacement joysticks directly. I tried the second option and it worked fine! in case the epoxy I used to fill the hole, crumbles and falls off - I can always redo it or glue the screws in for use with the second type of sticks.

don't know if all sticks can be removed, but it's worth to try, just after inspecting it with magnifying glass.
 
anyway, there was no need to unscrew those metal frames - at least I didn't do that.

don't know if all sticks can be removed, but it's worth to try, just after inspecting it with magnifying glass.

well there are much less discussion on spark nowadays, they're all about mavic mini or mavic air 2 which is all the hype today. even on a biggest spark group on my country most post are about selling their spark.

well back on topic, i disassemble it because i feel a little wiggle room when i twist the stick so i thought there is some way to remove it from the inside. but reading your post i think the only way is to pry it off. I'll decide what to do once i watch your video ( no pressure though ) I'm not in a rush anyway.

thanks for the updated info...good luck with the moving and stay safe
 
well there are much less discussion on spark nowadays, they're all about mavic mini or mavic air 2 which is all the hype today. even on a biggest spark group on my country most post are about selling their spark.

I was thinking about moving to other drones too, but in the end - seeing how do I use my Spark, I guess it totally suits my needs, and updating it would be just an empty run "to have the latest and greatest" even if I just don't need that ;)

well back on topic, i disassemble it because i feel a little wiggle room when i twist the stick so i thought there is some way to remove it from the inside. but reading your post i think the only way is to pry it off. I'll decide what to do once i watch your video ( no pressure though ) I'm not in a rush anyway.

thanks for the updated info...good luck with the moving and stay safe

thanks, moving finally ended, all most important installations finished [LAN & fiber - without internet I'm simply without work hehe], we're working from the new space now, all in all it was a positive change, as the new office that we "force-searched" is better and cheaper than old one, so.. win-win ;) but anyway...

the video is here! english subs available. I hope you'll enjoy it and it will clarify any doubts

 
Awesome job. ?

Thanks for the subtitles.

You are correct, $h*t happens. :D
 

Members online

No members online now.

Forum statistics

Threads
14,593
Messages
118,799
Members
17,987
Latest member
csdisme